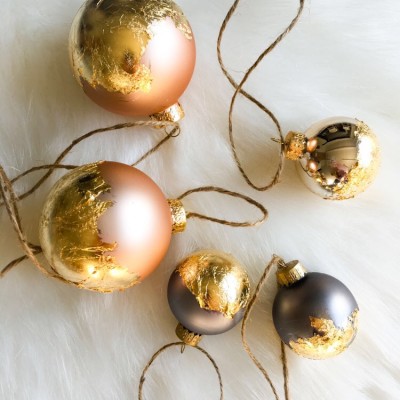
Gold Leaf Ornaments
Ingredients
- Toothpicks
- Skewers or chopsticks
- 1 large piece of foam
- Various colors and sizes round ornaments
- Gold leaf
- Glue adhesive
- 2 small paint brushes
- 1 spool rustic twine
Directions
Start by sticking the toothpicks (for smaller bulbs) and the skewers or chopsticks (for larger bulbs) into the foam. This is where you will place the bulbs while they dry.
Remove the tops off of all of the ornaments. Save for later.
Using one of the paint brushes, brush some of the adhesive on the bottom of the ornaments. You want a thin coat with no drips. It doesn’t need to be perfect or even. I like to do it kind of jagged so the gold leaf looks rustic.
Place the ornaments upside down onto the sticks and skewers. Let dry for 20 minutes or until the adhesive goes from white to clear and tacky.
Next place some of the gold leaf on the sticky part of the ornament. Gently press in. Using the other clean paintbrush remove excess gold leaf. It’s ok if some comes off or moves around. It doesn’t have to look perfect. Continue with remaining bulbs and gold leaf.
It depends on how many bulbs you use as to how much gold leaf you will need. 4 small bulbs will use about 1 medium sheet. 2 large bulbs will use up medium 1 sheet. So buy accordingly.
Place back onto the drying rack and let sit overnight to dry fully. Next day place the tops back onto the ornaments and if placing onto a tree, loop some rustic twine through the top and tie tightly.
DIY Courtesy of Megan Mitchell